How To Set Up Your Robot Vacuum Cleaner?
2024-03-25

You’ve bought a robot vacuum and are ready to start your hands-free household cleaning experience. However, first-time owners of automatic vacuums unfamiliar with these devices may be confused about how to assemble them, especially since the appliance also needs to be connected to Wi-Fi, an app, and possibly integrated with a smart home network.
Find out how to prepare your smart vacuum, regardless of the model and manufacturer of your appliance. This guide will walk you through the various steps: assembling the device, charging it, connecting the docking station to a power source, and readying the areas in your home that it will clean. It will also cover connecting the vacuum to your home’s Wi-Fi network and the manufacturer’s app.
Assemble the Robot Vacuum
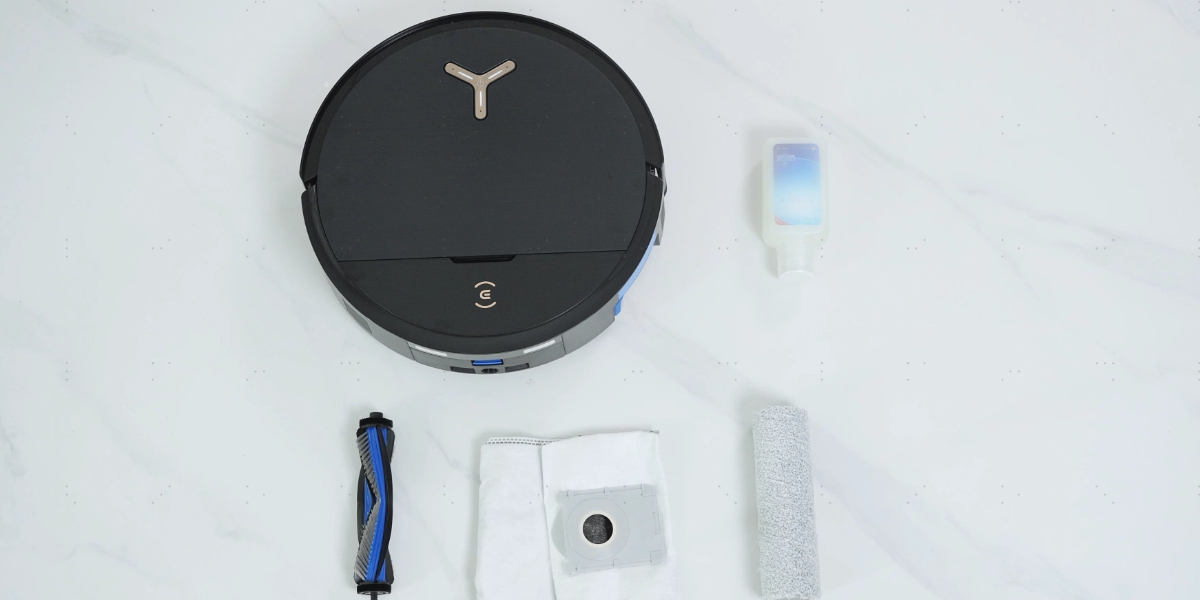
First, remove your new self-cleaning vacuum and its accessories from the box so you can assemble it and power it up. Follow these steps to set up your auto vacuum, which applies to any model and manufacturer:
● Take the automatic vacuum cleaner out of the box and strip the protective strips and films off its exterior.
● Attach the side brushes to the bottom of the robot floor cleaner, place the trays inside it, and attach the slope base to the charging station so that the cleaner can dock there.
● Turn the power switch on and place the device in the docking station to charge.
● Charge the robotic vacuum cleaner to 100% before its first use, which usually takes about four hours.
Next, move on to the docking station, which is where the appliance will return primarily to recharge. It may also dock to empty debris if it has an auto-empty station, and empty or refill water if the vacuum has a mopping function.
Set the Docking Station
Robot vacuum cleaners need a clear path in the areas surrounding the docking station and in the space they’re cleaning. Find a place in your home to keep the dock so it can stand steady and maintain a strong connection via Bluetooth with your smart vacuum.
Find the right spot for the docking station
Place the docking station against a wall near a power outlet. This will ensure the dock doesn’t slide around and is close to a power source. Put the dock on a hard, level surface so the robot vacuum cleaner can easily return to the station when it needs to charge. Then connect the station to the wall outlet with the power cable.
Create a docking zone
Give about 2 inches of clearance on the left and right sides of the docking station, and 31.5 inches in front of it. This way, the auto vacuum can back out of the station easily when it starts cleaning and return there to charge without encountering any obstacles. This open space will help the auto vacuum locate the dock easily as its sensors won’t be hindered by other objects. Make sure the docking zone is not within close range of stairs so that the robotic cleaner doesn’t fall when it leaves the charging station.
Sync the robot vacuum and docking station
Make sure your smart vacuum and the home station are synced, so the appliance can return to the dock when it’s finished cleaning or when it needs to charge. Here are the steps you can follow, no matter the model or manufacturer:
● Turn the robot vacuum on and make sure the docking station is plugged into a power outlet.
● Place the device in front of the dock and press the home or auto button.
● The appliance will detect the charging station and dock automatically.
Connect the Robot Vacuum to the Wi-Fi
You can use your robot vacuum cleaner without the internet, but this would rule out your ability to use the app, denying you a complete hands-free cleaning experience. Here are the steps to connect your smart vacuum to your Wi-Fi network, which apply to all models and manufacturers:
● Make sure the robotic cleaner, home Wi-Fi, and the smartphone or tablet you will operate the device with are ready and within close range of each other.
● Turn on the device, and enable Bluetooth on your smartphone.
● Activate the robot’s Wi-Fi by either pressing the ‘reset’ button, simultaneously holding down the ‘home’ and ‘clean’ buttons for 1-2 seconds, or pressing the network button.
● Your device will then connect to your home Wi-Fi network.
Follow these troubleshooting tips if your robot vacuum cleaner doesn’t connect to your home internet, which should work across robot vacuum cleaner models and manufacturers:
● Switch off mobile data on your phone and ensure it’s connected to the Wi-Fi network.
● Make sure your robot floor cleaner is completely charged and turned on.
● Ensure your Wi-Fi connection is not running on a VPN or proxy server.
● Check whether your robot vacuum cleaner supports 2.4GHz or 5GHz connectivity. Most older models can’t connect to a 5GHz network, so if your router is dual-banded, integrate both networks into one network name.
Download the App and Pair the Robot Vacuum
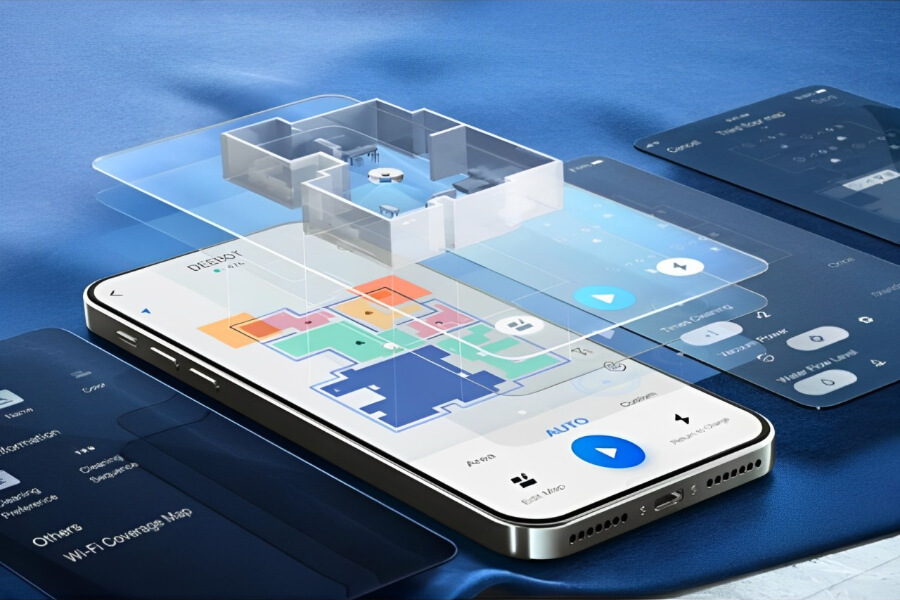
Most robot vacuum cleaners available in the market can be controlled remotely, thanks to an app, generally developed by the manufacturer. Pairing the self-cleaning vacuum with its corresponding app allows you to schedule cleaning sessions, modes, and routines. You can even customize maps and routines using the app, set no-go zones where you don’t want your robot to clean, and adjust vacuum power and water flow if your robot vacuum comes with a mopping capability.
Here’s how you can pair your automatic vacuums with its app, regardless of the model and manufacturer. For best results, make sure your robotic vacuum cleaner is switched on, and within five feet of your router and phone or tablet, and that your phone and vacuum Bluetooth are enabled:
● Download the latest version of the app on your smartphone or tablet from the app store.
● Open the app, create an account, and login.
● Allow the app to access the Bluetooth on your phone.
● Select your smart vacuum cleaner model within the app.
● Connect to your Wi-Fi by selecting the network and entering the password in the app.
● Check whether the Wi-Fi indicator on your self-cleaning vacuum is blinking to ensure that it’s connected to your home internet network.
● Return to the app to finish connecting the appliance with your phone.
For instance, users can connect the latest ECOVACS DEEBOT robot vacuum cleaner to the home Wi-Fi network by following simple steps. All they need to do is install the ECOVACS app, login after registering, and then connect the cleaner to the Wi-Fi via Bluetooth. Once this is done, the appliance can map your home for future cleaning sessions.
Set Cleaning Preferences
The next step is to program your housecleaning preferences. The latest robot vacuums are highly intelligent, allowing users to set cleaning preferences with just one click using AI visual recognition of the room type, floor material, and historical cleaning data.
You can schedule cleaning cycles at your convenience — when you’re at home, at work, on vacation, or even at night. You can even program your device with start and end cleaning times. Customize settings according to specific cleaning requirements by choosing from different cleaning patterns (random or programmed), modes (spot or intense cleaning), and preferences (quiet or turbo mode).

There are 3-in-1 vacuum cleaners — robot vacuums with a mop which have vacuuming, sweeping, and mopping capabilities — that give users the chance to decide how they want the different surfaces of their homes cleaned. These smart vacuums allow you to choose between vacuuming your home, mopping areas with tiled surfaces, or mopping after a vacuum session.
Prepare the Area to Clean
While several robot vacuum cleaners can navigate around common household objects, it’s still recommended that the space they clean should be clear of clutter and items that interfere with their sensors. This will ensure that the connection between the smart vacuum and its docking station remains strong and that nothing prevents its sensors from locating the dock.
Here are some tips to create a robot-friendly environment before you start using your smart vacuum:
● Remove cables and cords from the cleaning zone to prevent your robotic cleaning device from getting tangled up in them. Ensure the dock’s power cord is clear of the station base, so the smart vacuum can return to it easily.
● Move fragile furniture like floor vases and unsteady items like coat stands closer to walls.
● Clear reflective objects like mirrors, metals, and glass from the floor as they can prevent the auto vacuum’s sensors from detecting the docking station.
Maintenance Tips for Longevity
Once your robot vacuum cleaner is up and running, it’s important to maintain it to prolong the device’s lifespan. This involves cleaning and checking the appliance and its various components.
Perform these checks periodically to get the most out of your self-cleaning vacuum:
● Empty the device regularly to prevent clogging or backup from debris. If you have a self-cleaning vacuum with an auto-empty feature, clear out the storage bin every 30-60 days.
● Clean the filter regularly and change it every few months.
● Check the underside of the appliance for tangles and debris, and cut them out or wipe them away.
● Clean components like brushes, dustbins, and trays and replace them when they wear out.
● Update the robot vacuum’s software regularly to add new features and improve the efficiency of all its units.
● Maintain the battery by checking that the smart vacuum returns to its dock to charge after it completes a cleaning cycle, and ensuring you charge it regularly.
Related Products


